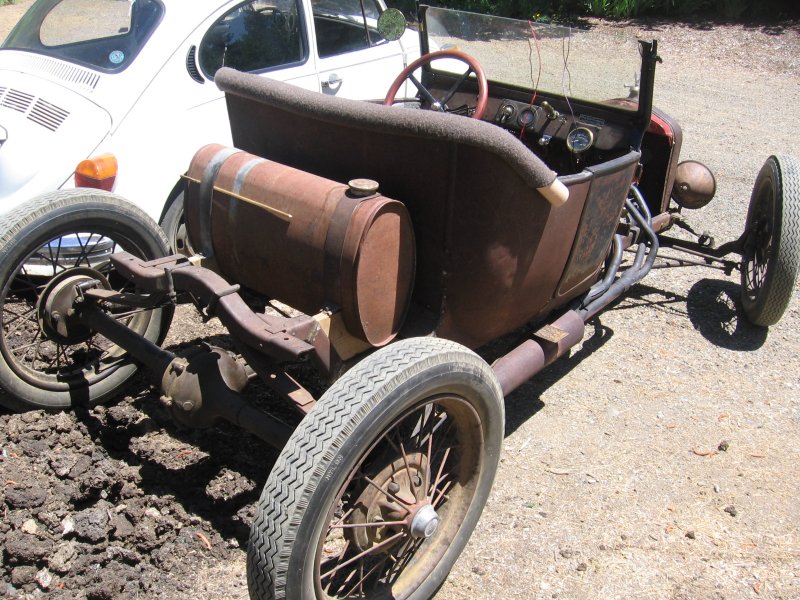
Picked this up yesterday. A little rough on the back panel and bottom edges and missing the sills, but also got the hood, firewall, radiator shell, windshield frame brackets and dash panel—I feel it was a great package deal. Its a '24 - 5 cut off touring. I want to do a pickup, so I will probably build a shortened bed unless find a clapped out steel one to slice and dice.
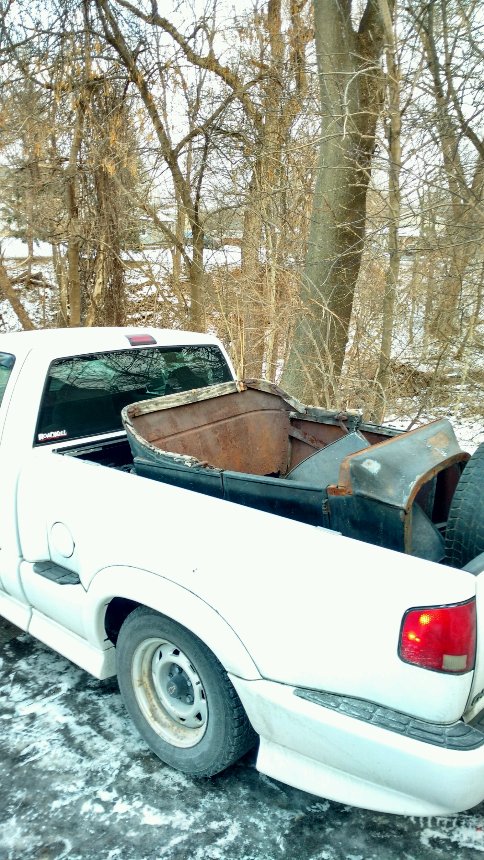
Good start!
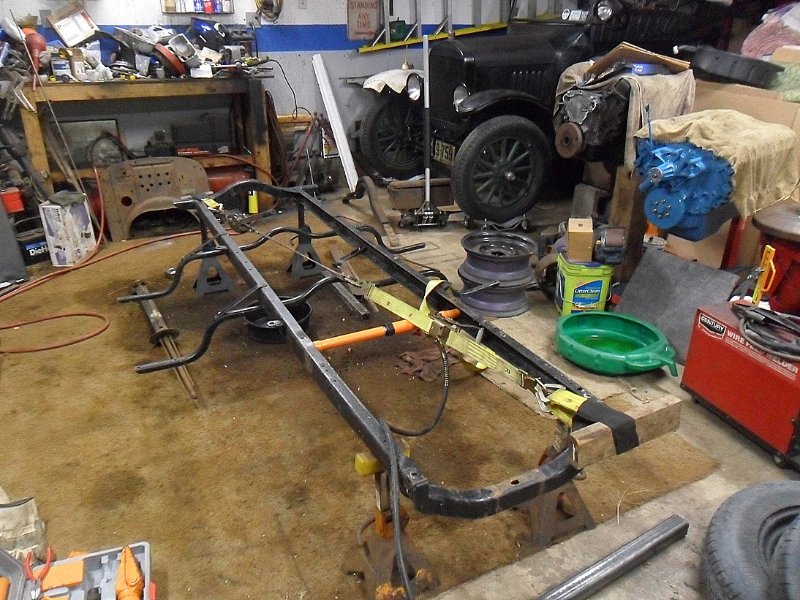
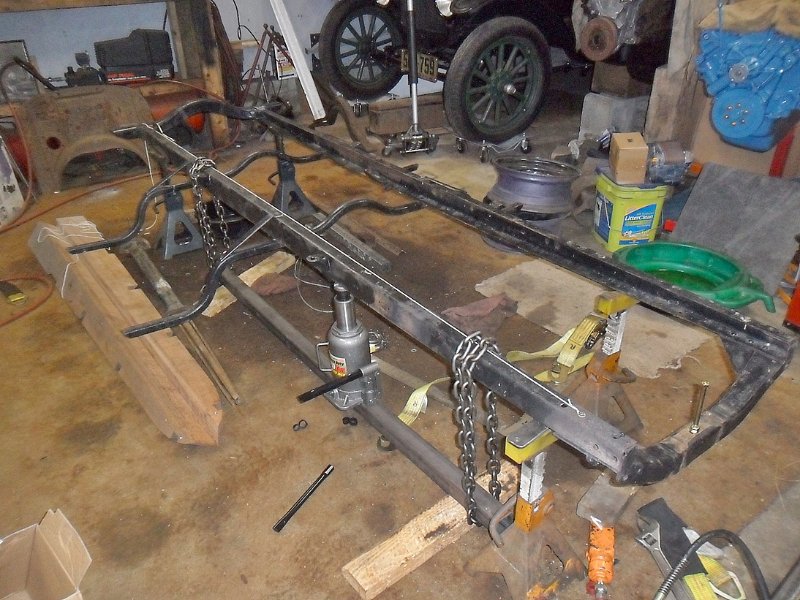
Tried my hand at straightening my frame yesterday. I did not succeed. I think the webbing in my tiedowns was stretching. I got it to move, but it would go back to the original measurements. Time to go get some chain from the box store this morning before they close down. I am 5/8" out of square.
The front crossmember is pretty banged up both in a push pull fashion. I would hate to have to cut the rivets out to get it out, but that my be the solution to loosen up the frame a bit. I will be welding in a new straight crossmember further forward to mount the spring in, so the original is only to merely mount the front of the engine.
I wasn’t able to move mine until I removed the front cross member. Not with the Come-Along I was using anyway. I had to move mine back about 1/4 inch to get it square again.
Tim, apparently these frames are both tough and fragile. I got it to move today using some chain I bought and my come-along. It actually moved easy, so the tiedowns were definitely the weak link—lesson learned. The chain I bought was rated at 3600 lbs, so my next weak link was my come-along, but it held.
Doin’ the twist:
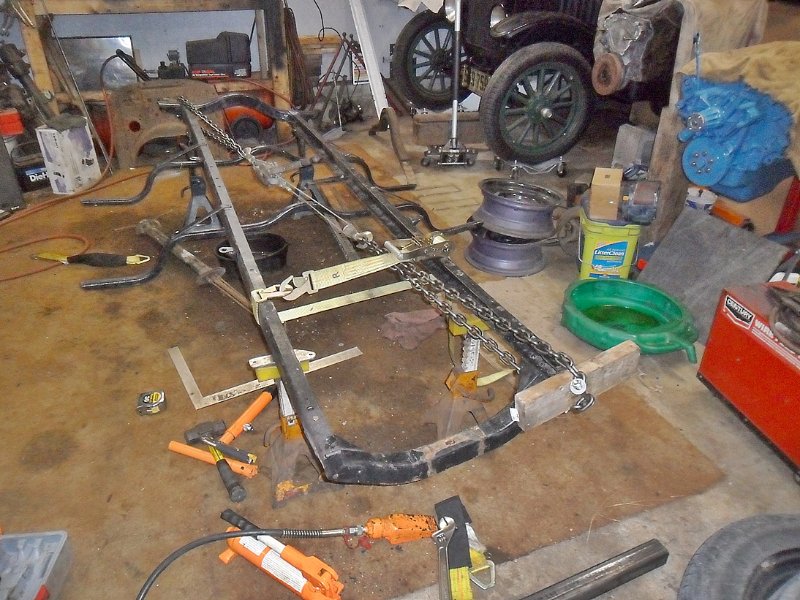
I actually had it within about a 1-8 -3/16" and thought I could do better. I should have just left it. I had to reverse the setup and go the other way just a bit. Of course that was to far that way, so back to the original way. I ended up a little better at 1/16" to 1/8". In race car land, that is close enough, so I figure in Model T land I am spot on, LOL.
It really is amazing to see how much flex these frames have.
Also to note, I don’t believe all the holes in the frame are totally accurate side to side. There are a couple of areas that are just persistently off square—namely the radiator mount holes. But the body mount holes are now square as is the engine pan ear mount holes, and engine pan/ hood shelves. I put bolts in the front shelf square holes and used them as reference going back to various points.
Next up, I have to take the bow out of the right rail right at the engine pan ear area. I think the left rail is OK, but I will double check. Then I’ll recheck for square and start cutting and welding for the new front crossmember. For now, that is it until after Christmas.
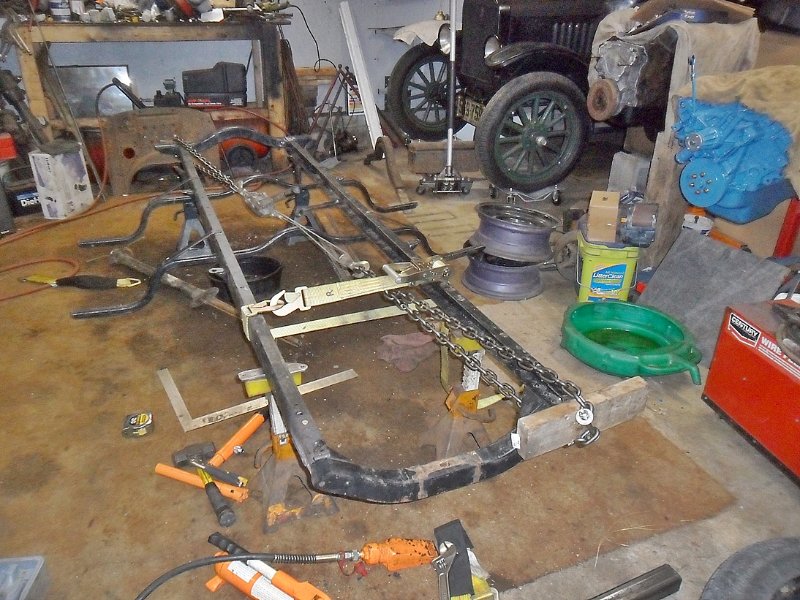
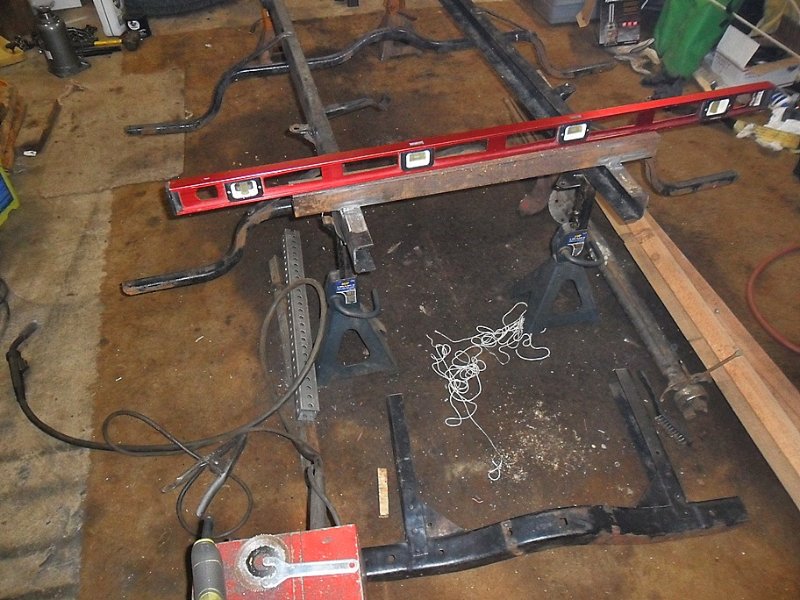
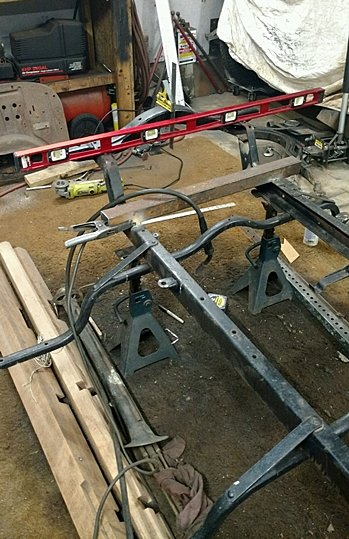
Finally getting out of the deep freeze here in NY. 30 degrees feels like a heat wave after the sub zero temps we have had for two weeks. So I ventured into the garage for a half hour or so (not heated when I am not in there–so still a little cold) and just about finished the frame straightening…I hope.
The right rail had a pretty good bow in it, almost the whole length. So following pictures I have seen, I set about taking care of that issue. 2"x2", 1/4" wall square tubing, some chain at each end and my trusty 20 ton bottle jack moved it real easy. I found it helped to put a 2x4 under the square tubing so chain slipped under the tubing.
The left rail checked out near perfect, so I will probably just leave it…we’ll see. Then I will check for squareness again before I start tackling the raised front spring crossmember I will be making and installing.
The pictures really help show what you are doing.
This will be a RPU when finished?
Tom,
My first intentions was to make a short pickup bed. Being a cut off touring body, it would be similar to my Canadian Cut Off Touring pickup I have.
However, I may not have anything past the body (front seat) now as for as body metal/wood. I have seen a couple of old pictures nothing but the gas tank back there and I kind of like it.
Unfortunately I am a very long ways from this in having to make a decision. This years goal is to just make a rolling chassis, and maybe get the body wood reconstructed.
Here are a couple of pics I really enjoy:
Model T Speedster 20.jpg

Those are awesome speedster pictures! A small bed in the back would be nice though, just to hold a few bags of groceries. And I think most speedsters incorporated a lockable wooden box behind the gas tank to hold tools etc. No doubt you are going to design and build a head turner.
Thanks for sharing as you go along.
Spent the evening looking things over on the frame and drawing up my plan for lowering the rear crossmember. Part of the plan is also to shorten the wheelbase to 96"
So with all that in mind, I drew up a set of plans in full scale after making a cardboard template of the side of the rear frame rail. The kickup will be 60 degrees, and raise the rear crossmember 5" to match what will happen in the front.
My first cut will be at 13.5" from the end of the rail where it meets the rear crossmember.
When I am done, the end of the rail should be 8" ahead of where the old one sat. The front crossmember will be moved 4" ahead. Thus shortening the wheelbase 4" from 100" to 96".
.

With the frame straightened, and leveled time to get to work. The first thing I did was mark where I was going to cut the rear frame off.
After welding a temporary piece of box tubing, squared to the frame so everything stays inline, I cut off the rear section.
With that done, I turned my attention to the front. I am using 3/16", 2"x2" square tubing. I cut two, 2" long sections, profiled them to fit the crossmember reinforcement bracket. I then tacked and measured and repeat. I repostioned these several times until I was happy and everything measured and leveled out correct. Then I final welded them in.
I noticed that somehow, the frame got slightly out of square again, 3/16 - 1/4". Really, for a T, not a big deal…but it bugged me when I had it a little closer. This is not exactly where you want to be straightening things after everything has been leveled and cuts have been made. But I couldn’t sleep, and get over it.
So tonight, I cut the weld on the Rt framerail where I welded in the piece of temporary box tubing. I used the come-along and puled it back in square. Triple checked it all, tacked the tubing back in place, triple checked it again, and welded it back in fully.
The result is everything is still level and square, and I have a tolerance between 0 - 1/16" for square (my 1/16" was the holes for the pan ears—every other point was perfect). I am very happy again…quite frankly I think I got lucky I didn’t make it worse rather than better.
The front crossmember will be welded in next, it is a piece of 2" box tubing, 3/16" thick walls, that I cut one side out of (the side with the welded seam was cut out). That was alot of work. I used my trusty angle grinder and 4 1/2" cut off wheels and I went through 4 of them. I was kind of shocked at that, as they usually last, but I also generally use 1/8" or less material thickness. Anyhow, the tubing fits great over the front spring…looks like I measured right.
I hate to redo anything, but if I realize I did something incorrectly I too can’t sleep until I go back and get it right. This happens more often than I would like to admit, but I have only been messing with
T’s for a couple of years and I don’t mind claiming ignorance.
You are doing a great job. The main advantage of doing it yourself is you know it was done right, you did the right thing.
Please keep posting especially the pictures, very inspiring!
Made a little more progress.
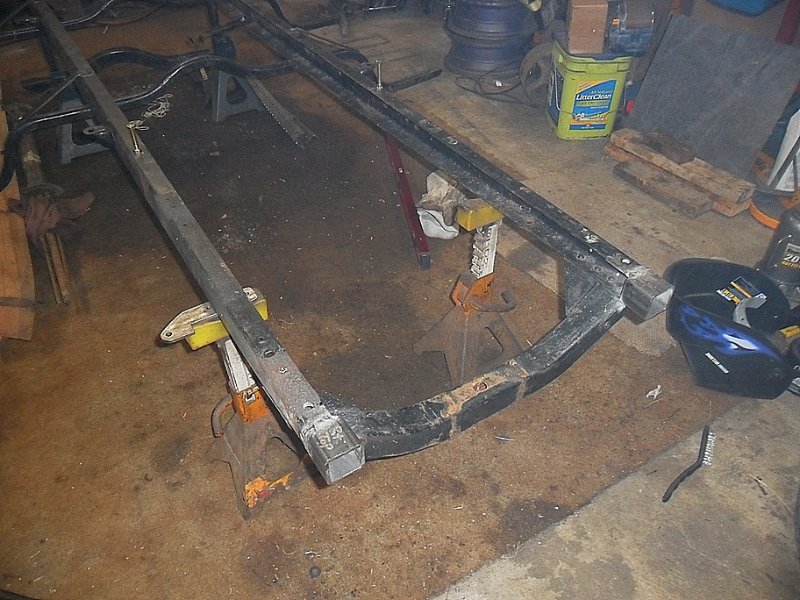
I have the front crossmember on (sorry no pic). Today I made my cuts and bends on the rear frame section. That part went fairly well. A little messy on my welds, but it definitely is not going anywhere. Here is a pic before I fully welded it.
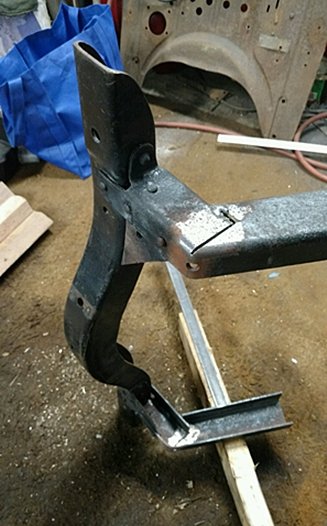
I then managed to get it tacked to the frame after some more trial and error fitting. My templates got me close, I think I just must have figured a little wrong on my angles. It currently is leveled, but I still have to check for squareness before I run the welds in. I came out at 5 1/2" drop, I was shooting for 5" to match the front. I’m not sure if I am really going to fix that 1/2" , I am thinking it will be fine…well see if it keeps me up at night though…
The frame is more or less done. It’s straight and square. I did make one minor screw up but I’m ok with it. I miscalculated what I was cutting off the main part of the frame, consequently my wheel base ended up as 94.5" instead of the planned 96". Again, not a huge deal for me, I got in a hurry, it’s done and over with. To continue of myself being off a bit, the square hole I filed out in the front crossmember for the spring bolt ended up at 5/8" instead of 9/16". I’ll have to fill a couple of edges and refile. No big deal, just more work.
I decided to wack the running board brackets, but I left the crossbar of the front one, and welded it to the frame for a litte more rigidity. I will be adding a carriage step to the right side to make it easier to get in.
I was able to meet a friend of mine halfway (he is a couple hours away) and got my Model A wheels I will be using, that he picked up for me a month ago. These are 30-31 wheels, decent shape for the price ($20 ea), but they do need a little spoke straightening on a couple. I would like to get them blasted hopefully.

I found a place I didn’t know existed semi locally to me. They do dustless blasting and were able to do my wheels, real reasonably, and did a great job. Today a washed them down with brakleen, and brought them into the basement to warm them up. Next I’ll prime them to keep them from rusting and go about straightening spokes and getting them true.

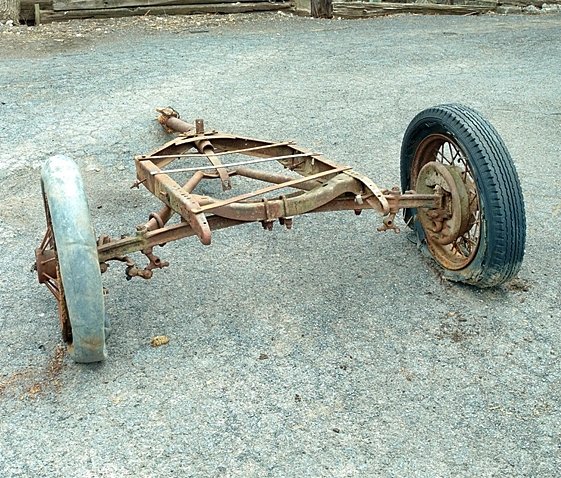
Been doing a little bit of work, draged an axle I have been saving out from behind of the garage. The axle was decent, but everything else attached was very rough.
I think I can salvage the leaf spring, but it has a couple leafs that are really rough and pitted. It was a 8 leaf spring, so not sure what it came off of, as my cut off touring pickup has 7 leaves. The second leaf from the top broke upon disassembly, but that my not be a big deal. Just trying to decide if I want to really use it and spend money getting it blasted or relegate it to doodlebug material.
The perches had to come out as the were not pointed right and were seized in. One is salvageable, the other ,again, might be at best doodlebug material, so add two of those to the list also.
The shackles are pure junk, but I think I might have a decent set.
Also attempting to straighten my Model A wheels I am using, I have been working on one, and it is not going that great. I have about .160" wobble in it, it seems to be bent in a couple spots. I have been trying to shrink the spokes by heating and quenching, but it seems to actually stretch them slightly.
If anyone is still out there watching…
I decided to do something different after finding a good deal via another friend of mine. I bought this homemade trailer, that had a Model A front end under it.
I started cutting all the junk off it to get the the good stuff. I’ll be honest, it’s not great, as you can imagine, used and abused. But suprisingly, the parts I needed to use were in servicable shape.
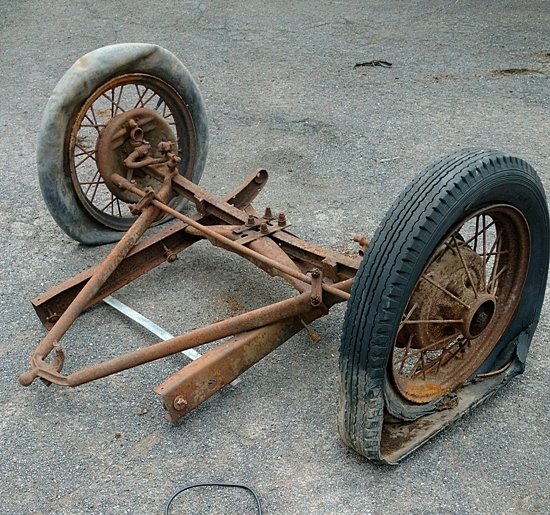
It was alot of work, I have about 6 hours total in rescuing the parts I wanted…which coincidentally were the only good parts left. Dropped these off at the blaster today, should have them back by the end of the week. For the $60 he wanted, it’s not worth my time to break out the sander, wire wheels, chemicals and other sorted cleaning utensils of years past.

Truth be told the radius rods would still be good for splitting, but I’m going to use the T radius rod instead which I already split. The whole point of this project was to gain some better–more reliable and modern steering for higher speeds. I know a good rebuilt T setup would suffice, but something about the steering gears all at the top of the column on the T scares me a bit. And hey, I like things different…soooo… Now I just need to find a good column / steering box.
Maybe time to try dropping the A axle? I like what you are doing.